



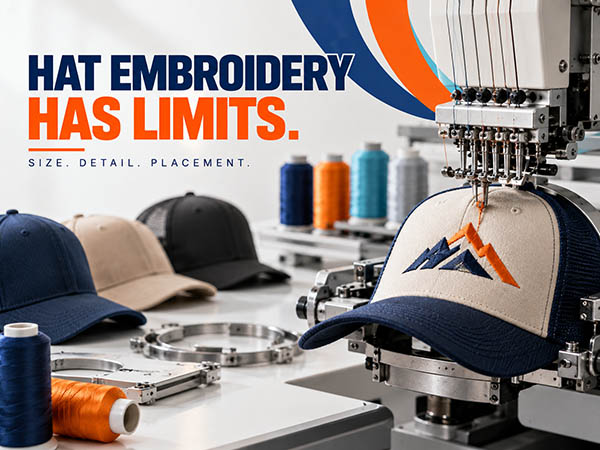
A logo can look perfect on a screen and still fail on a cap. Understanding the limitations of hat embroidery before production prevents unreadable text, distorted shapes and costly revisions.
What are the limitations of hat embroidery? Embroidery is durable and professional, but a cap’s curved crown and finished construction restrict design size, detail, placement, color effects, and production access.
These hat embroidery limitations do not make stitching a poor choice. They simply mean the artwork, hat style, placement, and embroidery method should be planned together before production begins.
What Are the Main Limitations of Hat Embroidery? (Quick Answer)
| Limitation | Why It Exists | What It Restricts | Work-Around |
|---|---|---|---|
| Curved crown | Fabric wraps and shifts under the needle | Circles, arches, borders, symmetry | Cap-specific digitizing with pull compensation |
| Small sewing field | Usable area ≠ cap size; crown height and panels limit it | Overall logo dimensions | Confirm max dimensions for the exact blank first |
| Center seam | Raised ridge changes fabric thickness | Lettering, borders, fine detail crossing it | Adjusted stitch angles and sequencing; or five-panel cap |
| Brim & frame clearance | Machine arm and bill block access on finished caps | How low a design can sit | Pre-assembly embroidery for edge-to-edge looks |
| Small text | Letters are built from physical stitches | Thin strokes, serifs, scripts, taglines | Enlarge, cut words, simpler typeface, or relocate |
| Gradients & photos | Thread makes discrete color blocks, not shading | Continuous tones, photographic detail | Reduce to a few thread shades, or use a patch |
| Color count | File runs a fixed color sequence | Number of thread changes, cost | Limit palette; prioritize clear separation |
| Fabric & structure | Foam, mesh, knit, soft crowns move differently | Stitch density, stabilization | Match backing, tension and file to the hat style |
| Dense stitching / 3D puff | Too many stitches stiffen and pucker | Tiny details, thin strokes, narrow gaps | Broad satin columns, foam-specific digitizing |
| Placement changes | Side/back areas offer less height and width | Reusing one file everywhere | Separate stitch files per location |
Hats are more difficult to embroider than flat shirts because the crown curves, shifts during sewing, and may include reinforced panels or thick seams.
The main cap embroidery challenges involve the available sewing area, restricted placement options, small lettering, cap-specific digitizing and differences between fabrics and hat structures.
The exact limits of embroidery on hats vary by product. A structured trucker cap, soft dad hat, knit beanie, and performance cap will not support the same artwork or machine settings.
Also Read: Is it cheaper to print or embroider hats?
Curved Surfaces Can Distort Designs
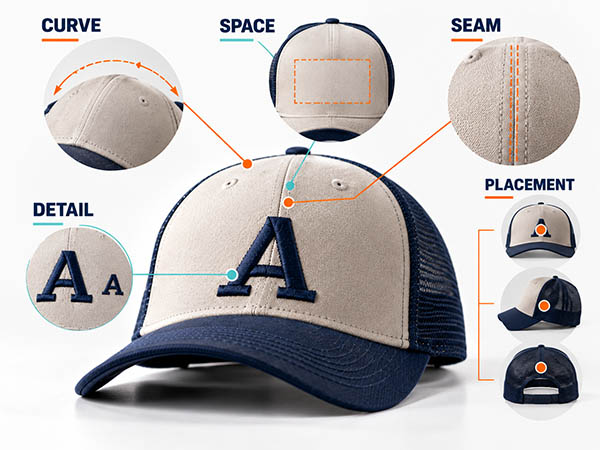
A logo created for a flat shirt may change shape when sewn around a curved crown. Circles, arches, borders, and symmetrical artwork are especially sensitive to embroidery distortion.
Professional digitizing adjusts stitch direction, sequencing, and compensation so curved cap embroidery holds its intended shape more accurately.
Finished Hats Restrict Machine Access
Embroidering a loose panel before assembly provides more access than decorating a completed cap.
Some very low, wraparound, or edge-to-edge designs seen on retail hats were stitched before construction.
With premade cap embroidery, the frame, brim, seams, and machine arm create real embroidery placement limitations.
Alpha Imprint: Trusted Local Partner for Custom Hats in Houston
Alpha Imprint helps businesses, schools, restaurants, teams, event organizers, and other Houston organizations identify embroidery restrictions before production begins.
Customers ordering custom caps in Houston can compare structured and unstructured caps, available logo areas, thread treatments and decoration positions.
Local artwork review also helps prevent unreadable lettering, distorted shapes, rejected samples, and repeated revisions.
For projects involving embroidery in Houston, the hat model, finished logo size, material, placement, and embroidery style can be evaluated together rather than treating the artwork as a separate decision.
Hat Size, Placement, and Construction Limitations
Hat embroidery size limits come from the usable sewing field, not the overall dimensions of the cap. Crown height, front-panel shape, seams, the brim, side panels, closures, and internal support all affect embroidery placement.
Maximum measurements should therefore be confirmed for the selected blank.
Changing the hat after digitizing can also create problems. A file prepared for a tall structured snapback may sit too high or become distorted on a low-profile unstructured cap.
Moving the same artwork from the front to the side or back may require resizing, resequencing, or a separate stitch file.
Front, Side and Back Areas Offer Different Amounts of Space
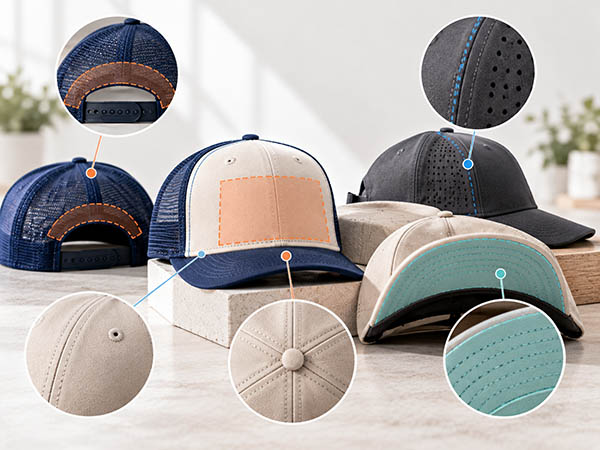
The front usually provides the largest embroidery sewing area, while side and rear placements offer less height and width.
Six-panel caps divide the front with a seam; some five-panel hats provide a broader uninterrupted surface for front panel embroidery.
The exact usable area also depends on the frame and machine, so confirm dimensions before resizing the logo.
The Center Seam and Brim Limit How Low a Design Can Go
A raised front seam changes fabric thickness and can disrupt lettering, borders, and small details.
Center seam embroidery often requires adjusted stitch angles and sequencing rather than simply running a standard file over the seam.
Finished caps also need clearance between the design, frame, and bill.
Hat Structure and Fabric Affect the Result
Firm front panels usually provide greater stability. Soft crowns may shift and require additional backing or tighter control during hooping.
Trucker foam, performance materials, knit fabric, and heavy workwear also respond differently to needle penetration and stitch density.
Because hat fabric affects stabilization, tension, backing, and movement, one embroidery file should not be expected to perform identically on every style.
Logo and Artwork Limitations in Hat Embroidery
Most logo embroidery limitations come from trying to place too much visual information inside a small curved area.
Successful hat logos usually rely on recognizable shapes, clear color separation, controlled detail, and lettering that remains readable from a normal distance.
Simply shrinking artwork does not reduce embroidery design complexity.
Taglines, fine borders, shadows, gradients, and detailed illustrations may need to be removed, enlarged, redrawn, or produced through another decoration method.
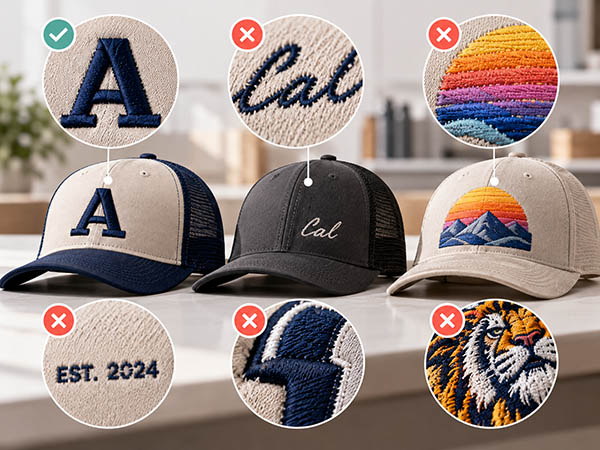
Very Small Text and Fine Details May Become Unreadable
Embroidery builds letters from physical stitches, not pixels.
Thin strokes, tight spacing, sharp serifs, and decorative scripts may close up or lose definition.
There is no universal minimum embroidery text size because readability changes with the font, thread, fabric, machine setup, and final dimensions.
For better small lettering embroidery, enlarge the text, reduce the number of words, select a simpler typeface, or move long wording to another location.
Gradients, Photographs, and Too Many Colors Require Simplification
Thread produces separate stitched color areas rather than continuous digital shading.
Gradients can be translated into a limited number of thread shades, but exact photographic transitions are difficult to reproduce.
For successful photo-like embroidery, textures, shadows, and tiny color changes usually need to become simpler shapes.
Additional colors can also increase stops and production complexity because the embroidery file controls a defined color sequence.
Dense Stitching and 3D Puff Have Their Own Restrictions
Increasing stitch density is not always the solution to weak coverage. Excessive stitching can make the crown stiff, increase puckering, and contribute to needle or thread problems.
The main 3D puff embroidery limitations involve artwork shape.
Puff works best with broad satin columns, adequate spacing, covered ends, and a file specifically digitized for foam.
Tiny details, thin strokes, and narrow internal gaps are usually unsuitable.
Digitizing and Production Challenges
Strong artwork can still produce poor hat embroidery quality if the digitizing or machine setup does not match the cap.
Common visible problems include shifted outlines, puckering, crooked placement, unclear text, and broken thread.
A test on the actual hat style is important because software previews cannot fully predict how a curved, seamed, or flexible crown will behave during production.
Hat Designs Need Cap-Specific Digitizing
A file prepared for a flat left-chest design should not automatically be reused for a cap.
Cap embroidery digitizing may require different underlay, stitch direction, center-out sequencing and pull compensation to manage fabric movement and maintain embroidery registration.
Front, side and back versions may require separate files.
Significant size changes can also require re-digitizing instead of automatic scaling.
Hooping, Speed, Tension, and Needle Condition Affect Quality
During cap hooping, the crown must remain tight, level and centered.
A loose or crooked cap can shift while sewing. Excessive speed may worsen registration, while poor thread tension, an incorrectly adjusted bobbin or a worn needle can produce loose stitches and breaks.
These are production challenges, not proof that embroidery is unsuitable.
Experienced providers adjust framing, backing, needles, speed, and tension for the selected hat.
How to Work Within Hat Embroidery Limitations
Most restrictions can be managed by creating an embroidery-friendly logo, selecting the hat before finalizing the file, and testing uncertain designs.
Simplification protects brand recognition when it keeps the strongest icon, lettering, shape, or color rather than forcing every detail onto the crown.
Simplify Hat Artwork Without Losing Brand Identity
Remove small taglines, enlarge important elements and create a simple hat logo variation for small placements.
Our hat design ideas help brands identify which visual elements deserve priority on a cap.
Choose an Embroidery Style or Alternative That Fits the Artwork
Flat embroidery suits many clean logos, while puff works best for bold shapes.
Patches may hold complex outlines or details that are difficult to stitch directly onto a curved crown.
These hat embroidery ideas can help compare embroidery styles and other alternative decoration methods, including printed patches and transfers.
Conclusion
Now you have the answer to the question: “what are the limitations of hat embroidery”? The main hat embroidery limitations involve available space, crown curvature, seams, small details, fabric stability, and cap-specific digitizing. Careful planning reduces most of these problems.
Choose the hat and placement before approving the final artwork, then test uncertain designs.
We help turn your logo into a practical solution for durable custom embroidered hats.